Supabase CLI
Develop locally, deploy to the Supabase Platform, and set up CI/CD workflows
The Supabase CLI runs the entire Supabase stack on your own machine or in a CI environment, so you can build and test locally, then connect your project to a hosted one when you're ready to deploy.
- Quickstart is the two-command version, if you already have the CLI and a container runtime.
- Set up a local project installs the CLI and brings the stack up on your machine. Start here if you haven't run it before.
- Connect to a hosted project links your local directory to a project on the Supabase Platform.
- Change your CLI version updates the CLI and switches between stable and pre-release builds.
- Telemetry covers what the CLI collects and how to opt out.
Quickstart#
With two commands, you can set up and start a new local project:
- Run
supabase initto create a new local project. - Run
supabase startto launch the Supabase services.
Global command or project dependency
How you run a CLI command depends on how you install it. Homebrew, Scoop, and the Linux packages give you a global supabase command. Installing with npm, pnpm, yarn, or bun adds the CLI to one project instead, so you run it through your package runner as npx supabase <command>. This page writes every example as supabase <command>.
The CLI is project-scoped either way. Most commands, including start, expect a directory that supabase init has already set up with a supabase directory and a config.toml. Run init first, then the rest from the same directory.
Set up a local project#
Install the CLI, bring the Supabase stack up on your machine, and stop it when you're done.
Install the Supabase CLI #
-
Install the CLI as a project dev dependency. This command adds the CLI to a single project rather than installing a global command:
npm install supabase --save-dev# or: pnpm add -D supabase / yarn add -D supabase / bun add -D supabase -
Pin the version in
package.jsonso your whole team uses the same CLI version. -
Run the CLI through your package runner:
npx supabase --help# or: pnpm supabase / yarn supabase / bunx supabase
The Supabase CLI requires Node.js 20 or later when run via npx or npm. Older Node.js versions, such as 16, are not supported and fail to start the CLI.
Run a local Supabase project #
The most common thing you'll do with the CLI is run the full Supabase stack (Postgres, Auth, Storage, and the rest) on your own machine. That stack runs in Docker containers, so you need a container runtime installed first. On Windows and Linux, follow the official guide to install and configure Docker Desktop.
On macOS, we recommend OrbStack instead of Docker Desktop. It's a drop-in replacement that handles extended file attributes (xattrs) on mounted volumes and container networking more reliably than Docker Desktop. It also starts faster and uses less CPU, memory, and disk, which makes a noticeable difference when running the full Supabase stack.
Alternatively, you can use a different container tool that offers Docker-compatible APIs:
| Tool | Platforms |
|---|---|
| Rancher Desktop | macOS, Windows, Linux |
| Podman | macOS, Windows, Linux |
| colima | macOS |
To bring the stack up:
-
Start your container runtime.
-
Open a terminal in the directory where you want to create your project.
-
Initialize the project:
supabase initThe command creates a
supabasedirectory, which is safe to commit to version control.initcreates local files only: it doesn't sign you in or connect the directory to a project on the Supabase Platform. To connect one, see Connect to a hosted project. -
Start the Supabase services from the same directory:
supabase start
If you installed the CLI as a project dependency with npm, pnpm, yarn, or bun, run npx supabase init and npx supabase start instead. See Install the Supabase CLI.
The first run takes time while the CLI downloads the Docker images. It pulls the entire Supabase stack, plus a few extra images useful for local development, such as a local SMTP server and a database diff tool.
Access your project's services#
After all the Supabase services are running, the CLI prints your local credentials. The output looks like this, with the URLs and keys you use in your local project:
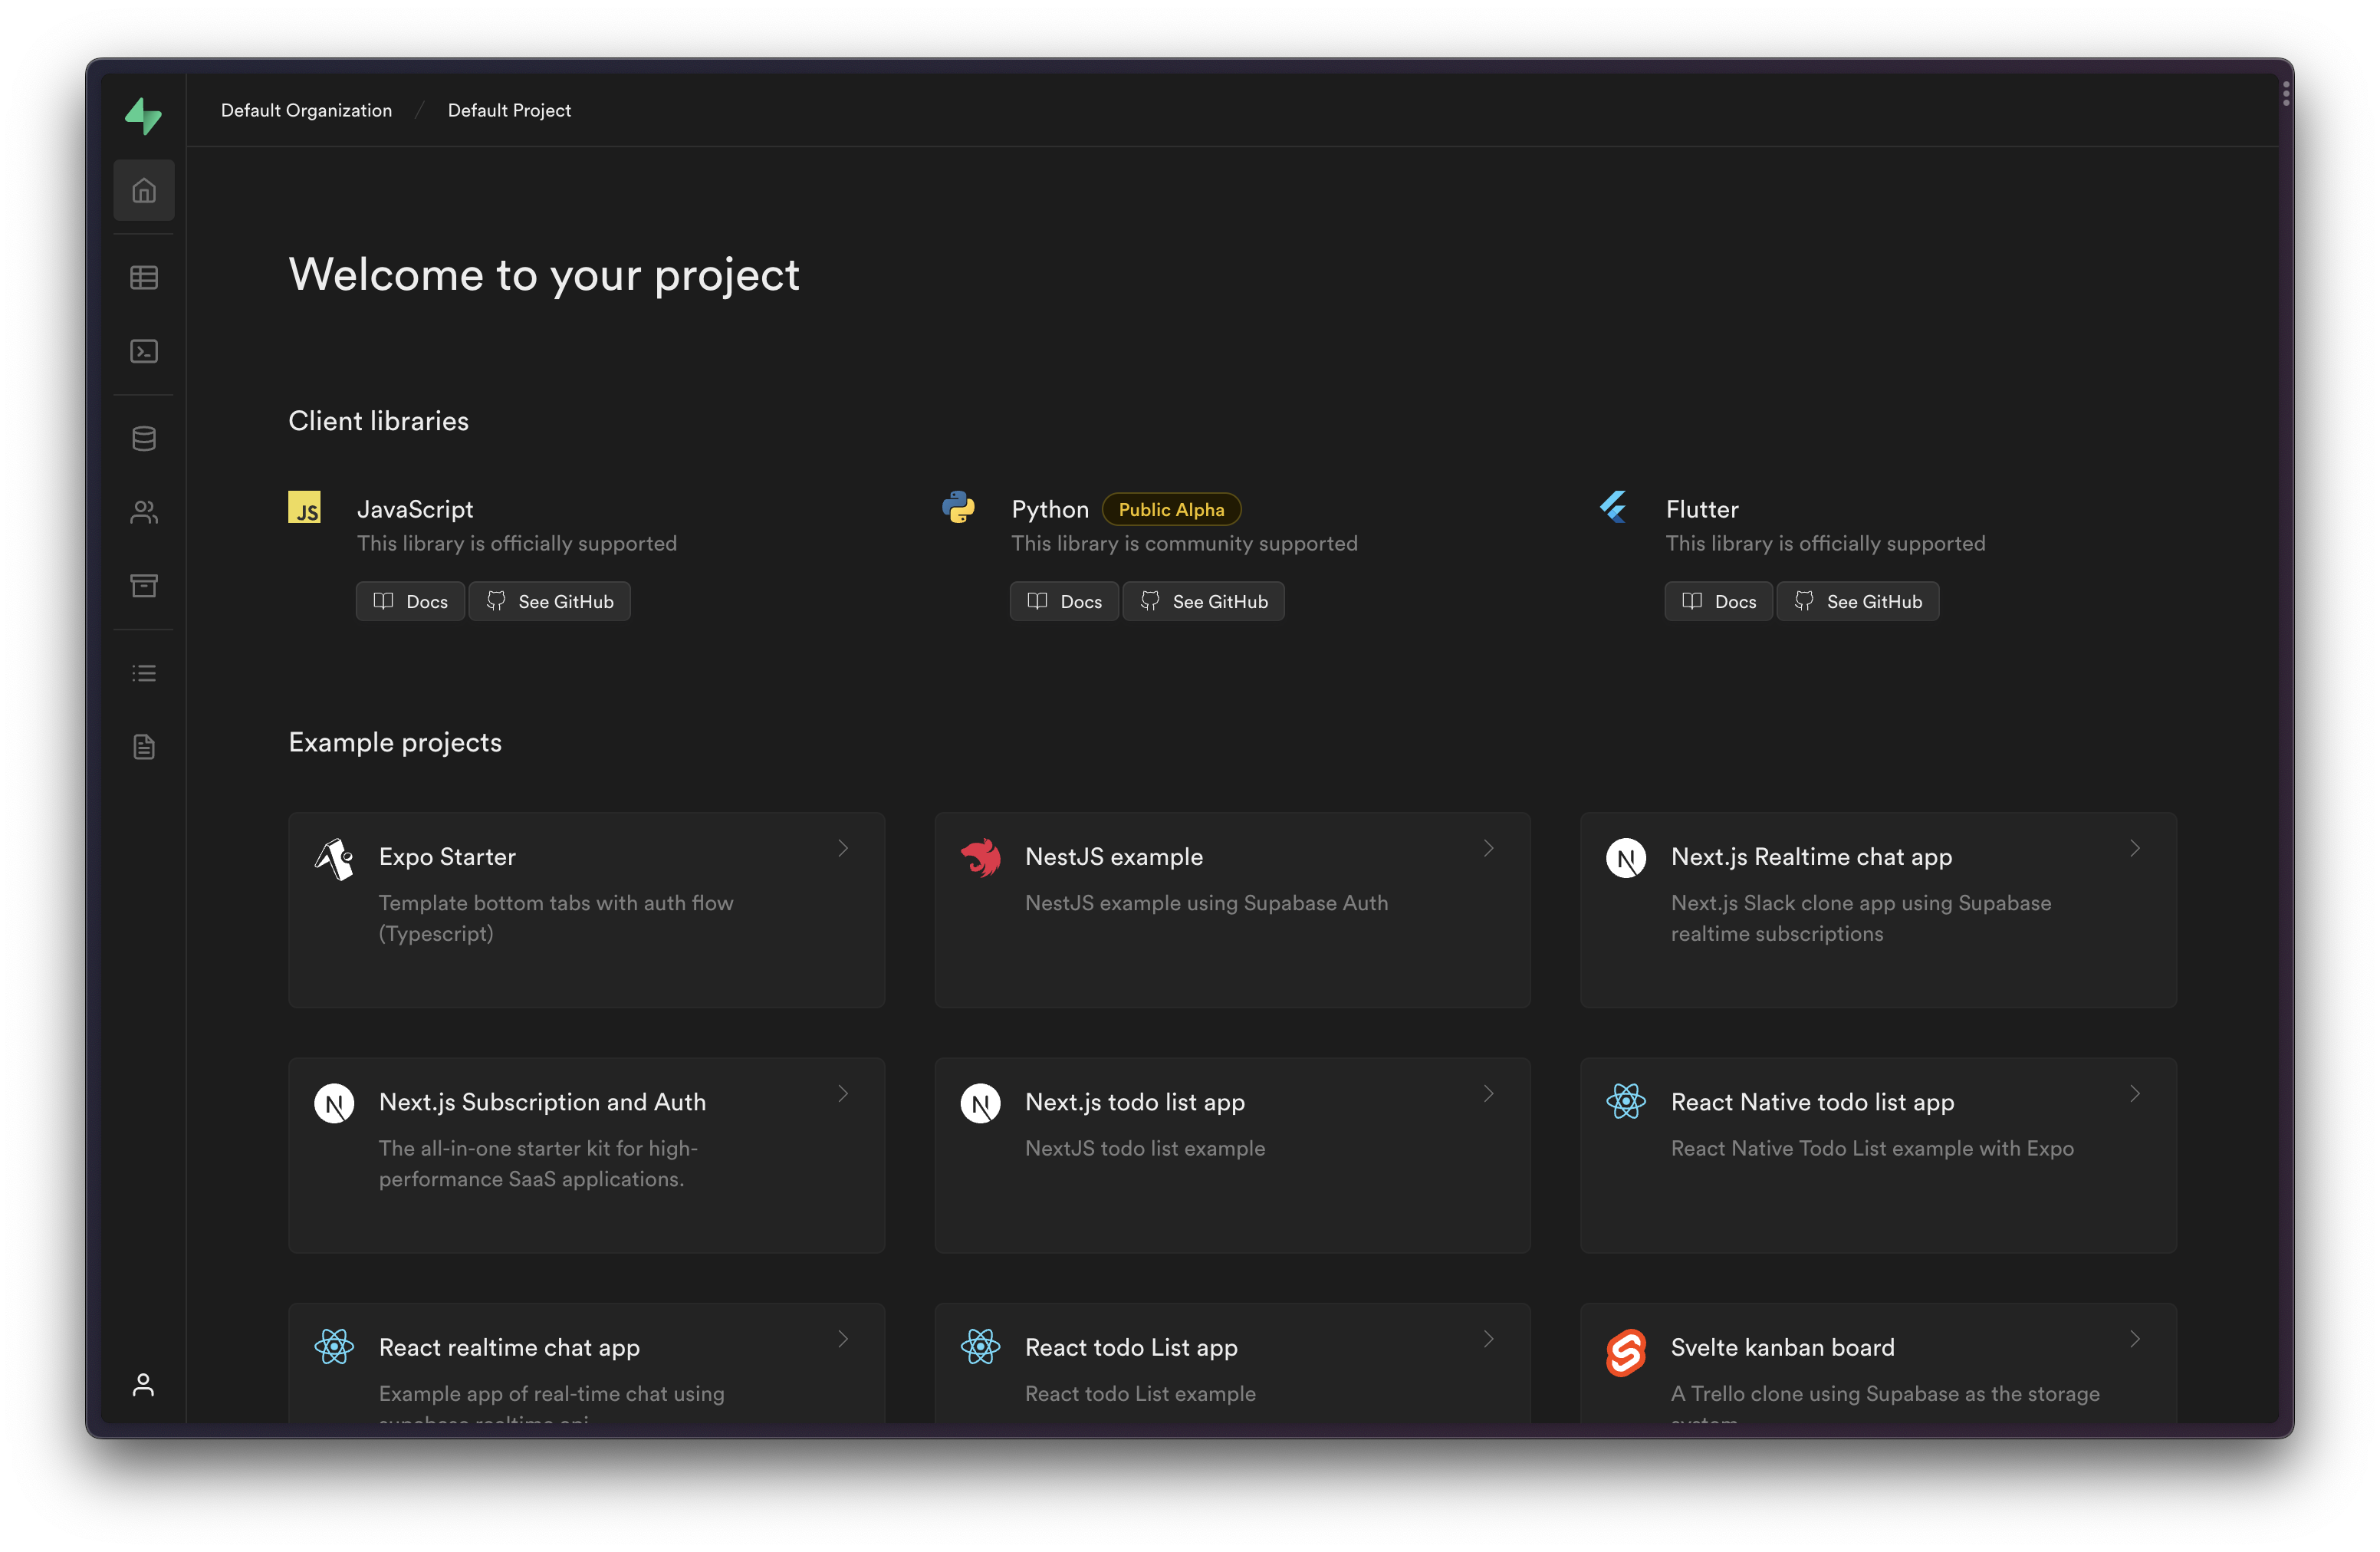
Started supabase local development setup.╭──────────────────────────────────────╮│ 🔧 Development Tools │├─────────┬────────────────────────────┤│ Studio │ http://127.0.0.1:54323 ││ Mailpit │ http://127.0.0.1:54324 ││ MCP │ http://127.0.0.1:54321/mcp │╰─────────┴────────────────────────────╯╭──────────────────────────────────────────────────────╮│ 🌐 APIs │├────────────────┬─────────────────────────────────────┤│ Project URL │ http://127.0.0.1:54321 ││ REST │ http://127.0.0.1:54321/rest/v1 ││ GraphQL │ http://127.0.0.1:54321/graphql/v1 ││ Edge Functions │ http://127.0.0.1:54321/functions/v1 │╰────────────────┴─────────────────────────────────────╯╭───────────────────────────────────────────────────────────────╮│ ⛁ Database │├─────┬─────────────────────────────────────────────────────────┤│ URL │ postgresql://postgres:postgres@127.0.0.1:54322/postgres │╰─────┴─────────────────────────────────────────────────────────╯╭──────────────────────────────────────────────────────────────╮│ 🔑 Authentication Keys │├─────────────┬────────────────────────────────────────────────┤│ Publishable │ sb_publishable_... ││ Secret │ sb_secret_... │╰─────────────┴────────────────────────────────────────────────╯# Default URL:http://localhost:54323The local development environment includes Supabase Studio, a graphical interface for querying and editing your database.
Stop local services #
When you finish working, stop the stack. Stopping doesn't reset your local database:
supabase stopWith the default ports, supabase start runs one local project per machine, because every project's config.toml uses the same ports. To run several local projects or git worktrees at the same time, see Running multiple local projects.
Connect to a hosted project#
The stack you started in Run a local Supabase project runs only on your machine. Nothing reaches a hosted project until you sign in to the CLI and link your local directory to one.
For the steps, see Pushing to a remote project. To run deployments from CI, see Configure GitHub Actions.
Change your CLI version#
These sections cover the CLI itself rather than your local project.
Use the beta channel #
Pre-release CLI builds ship from the development branch and are versioned X.Y.Z-beta.N. Use the npm beta dist-tag, or install supabase-beta with Homebrew or Scoop. supabase-beta is a separate package from supabase.
Install as a dev dependency:
npm install supabase@beta --save-devOr run without installing:
npx supabase@beta --helpUpdate the Supabase CLI #
Update the CLI with the same package manager you installed it with. See the CLI releases page for available versions.
Update the CLI with npm:
npm update supabase --save-devUpdate to the current beta release, or switch a stable install to the beta channel:
npm install supabase@beta --save-devIf you have any Supabase containers running locally, stop them and delete their data volumes before upgrading. Deleting the volumes lets Supabase managed services apply new migrations on a clean local database.
Back up before you stop
supabase stop --no-backup deletes your local schema and data changes. Save them first.
-
Save local schema changes as a migration:
supabase db diff -f my_schema -
Dump local data to your seed file:
supabase db dump --local --data-only > supabase/seed.sql -
Stop the containers and delete their data volumes:
supabase stop --no-backup
Telemetry#
The Supabase CLI collects telemetry data about general usage. Participating in this program is optional, and you can opt out at any time.
How to opt out#
-
Disable telemetry:
supabase telemetry disable -
Confirm the current setting:
supabase telemetry status
To enable telemetry again, run supabase telemetry enable.
You can also opt out using the SUPABASE_TELEMETRY_DISABLED=1 environment variable. The broader DO_NOT_TRACK=1 convention is also respected.